Day 1
Righto, time to levitate some of the panels currently taking up my entire house slab, and put them somewhere useful.
Lined up a lift, an extra-tall ladder and a bunch of friends & family, and we set to work on Saturday morning. My sparkie turned up for the day as well – partly to make sure we didn’t mess up any wiring, but also just to see a panel roof get put together.
First cab off the rank was the three weird-shaped panels where the angle of the building changes. I’d put up a long length of T-section steel (with the flange on the bottom, like a lintel) to act as a joiner, so the panels could butt up against that and hide the ugly join.
So I had one weird little triangular panel, less than 3m long on the long side:
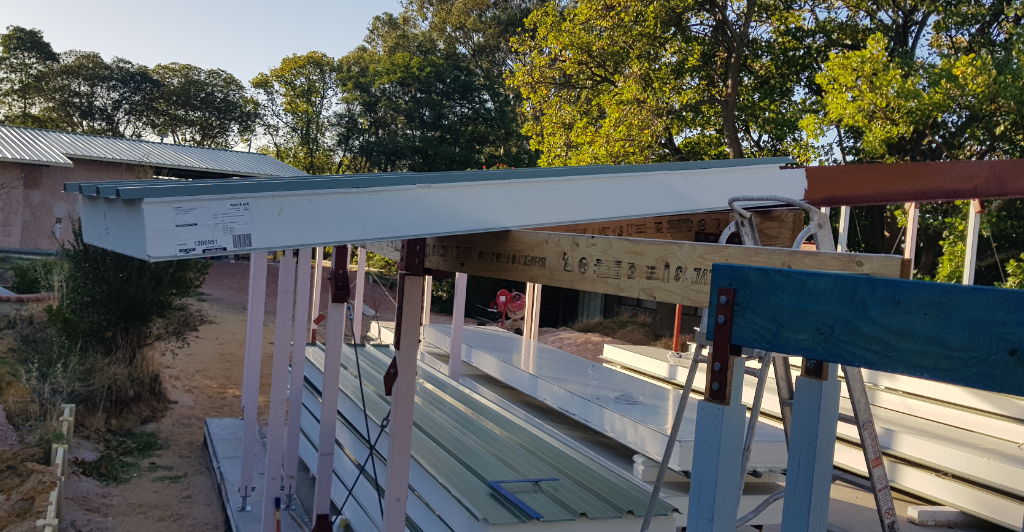
The next panel was that length on the short side, then 3.7m longer on the longer side. The third panel was a 10.5m monster, again cut with a slanted end to go up against the T-beam:
The rest of the south face was at least square panels, with electrical cables scattered seemingly at random across them. The tricky bit was getting the massive 9.5m panels up through the structural framing – mainly because of the interior beam and its posts getting in the way.
A few of them we had to lift the panel clear of the outside beam while someone inside held one end down to angle it up, shuffle the panel out (because the lift couldn’t get it clear of the interior beam while staying centred) out until someone standing on the boundary could ‘catch’ it. Then raise the lift further while the outside person held their end down to angle it up. A bit clumsy, but we got away with it.
We nearly finished the south face on day 1 – we stopped one panel short because one of my helpers had to leave, and we would have had to reconfigure the entire lifting arrangement to get it up from the outside of the building.
A couple of small whoopsies for the day: one was losing track of how many panel we’d put up, and missed putting one of the wired panels in the right spot. Easily fixed in the end – we just used the lift to pull the panel back out of its lock, moved it further down the beams, put the right panel in its place and then moved the first one back in and reconnected it.
The other was where I’d cleverly measured the holes for the electrical cables in the panels to come down in the middle of the outside bale wall, forgetting that one short beam in the structure (on the outside wall of the pantry) was also….right in the middle of the wall. In the process of lining all the panels up exactly with the ridge beam, it turned out this cable was coming down smack bang on top of the beam, so we had to do some quick drilling and chiselling to make a little hole in the beam.
Day 2
A new day, with some new helpers (and my dad backing it up from yesterday like a legend). Hauled the lift out to the back of the house, took the side fence down, brought the last panel around via the neighbour’s backyard and popped it up – went up surprisingly easily in the end, just took some mucking around to get it there.
Over to the north face, which was mostly nice boring panels with only two wired ones (one in each of the second bedroom and study.) First panel took a bit of mucking about to get it in place, since we lifted it from inside and had to shuffle it out to the extended rafters outside. With that in place the next seven or so went up really fast. Even got them up in the right order!
It got a bit curly when we got back to the extended sliver of panel next to the T-beam. I’d been wondering how easily this would go together, and apparently the answer was going to be “not at all.” This is a weird bit of roof where the north face ends at the ridge beam, then continues under the south roof as it transitions into the ‘bent’ section of the house. The lesson here is clearly that architects are evil, and if they ever say “Hey we had a great idea” you should run away very fast! 🙂
Even though the panels were nicely aligned between north and south faces, there wasn’t enough room to get the last panel in! We tried a few ways of manoeuvring it around, but it didn’t get any skinnier and there simply wasn’t enough room – basically the problem is that each panel overlaps its neighbour by 10-15mm which is buried in the tongue-and-groove arrangement of the ceiling skins once they’re together, but you need that 20mm of clearance to get the thing installed.
Only solution was to cut back the extended panel enough to get the new panel in the gap…this edge of the panel will be (almost?) entirely hidden by external flashing, but I think there’ll be some “making it up as I go along” as well.
Even with that extra gap, we had to perform some interesting shenanigans to get the panel in – in the end we more-or-less had the top edge of the panel in line, then a complicated arrangement of timber across the bottom edge of the panel and some ratchet straps to haul it up into its final place.
The next two panels have a very strange angle where the north roof butts into the living room wall, because of the bent wall intersecting with the pitch of the north roof. It took me ages to work out how to even draw this in my model of the house, never mind put it together. I wasn’t confident enough of my model matching reality to cut this panel beforehand, so we ran a bunch of tape measures to get the actual angle and then cut it – and I have to say we nailed this one. The last two panels went in relatively easily, and fit perfectly.
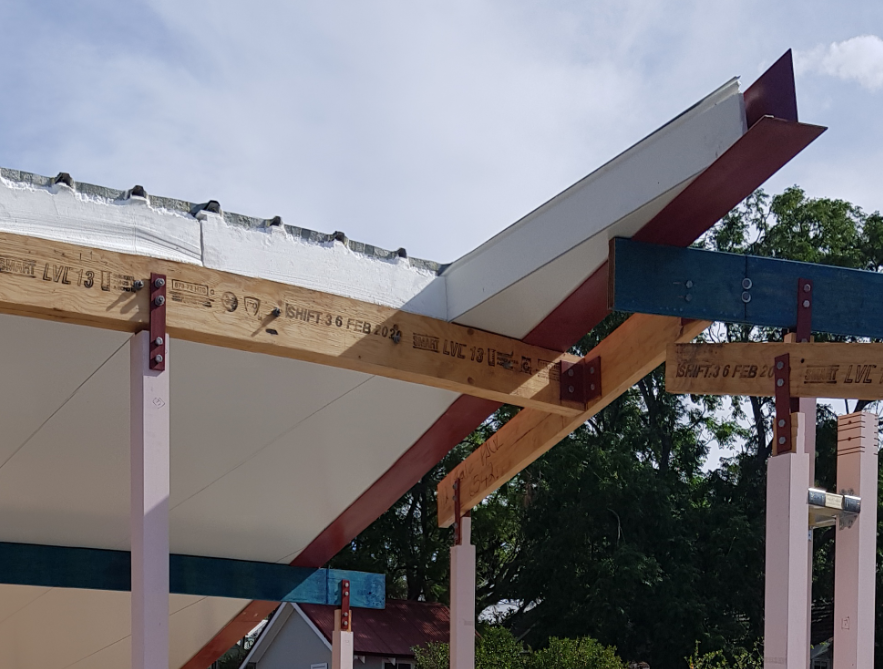
This is the final two panels and their funny-angled top end, just to illustrate how weird this got:
The top beam is the continuation of the south face’s plane which continues over the living room. The lower blue beam is the continuation of the north face where it intersects with the living room wall. And neither of them are the angle from the horizontal of those actual planes, because of the 15° bend relative to the back of the building where those planes are based. Argh!
Slightly exhausted after two heavy days of roofing, but it’s really satisfying to get this done. Still got 12 panels to come in, but they’re just a big block of skillion roof which should be “simple” by comparison.