I haven’t posted for a bit, because making even more posts with the title “More rendering!” seemed a bit redundant…but now I’m getting comments on the lack of updates so there’s clearly no keeping you lot happy. :p
I’ve been interleaving days rendering the outside with finishing prepping the inside walls, and prepping outside walls so they can be rendered, and basically chasing myself around the building. The prepping is mostly stuff I’ve shown before – mowing walls, meshing bits and pieces, generally cleaning things up to make it possible or easier to render.
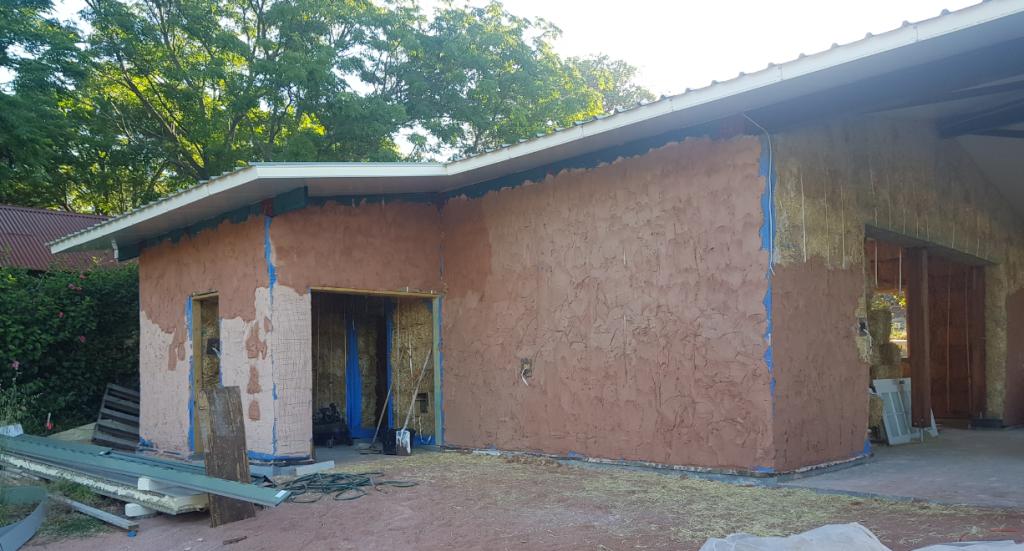
This was rendering day, so we attacked the eastern wall – some of this had been done as our first attempt at rendering, but there was still the high section of the wet area wall, the wall over the dusty room doors and the main eastern wall to do.
First I had to do a bit of remedial work – the ladder frame over the dusty room doors (which is a span of about 1.9m) had sagged in the middle under the weight of the bales – not much, only 5mm or so, but it was enough to be noticeable and I knew it’d be hard/impossible to resolve cleanly later. I wedged the middle of the ladder up just above level, attached a couple of lengths of bracing strapping from the ladder to the beam above it, kicked out the wedge and it dropped nicely into level. I really hadn’t expected this ladder to drop, but it’s interesting just how much pressure the bales put on the substructure, and without an independent top plate over this doorway there was nothing to reinforce it. All good learnings. 🙂
Anyway, rendering – lots of high work in this section, but still within range of the ground so we could do hawk relays and rip through it at a decent pace. This was also the first instance of rendering around a power point – there’s a couple of external points on the shed for general usefulness – which went surprisingly well. This was my first method, with a backing plate of 25mm ply screwed to a couple of stakes hammered into the bales, then a standard wall box inserted and mesh stapled to the backing plate to tie it all into the render.
The outside box the next morning after rendering:
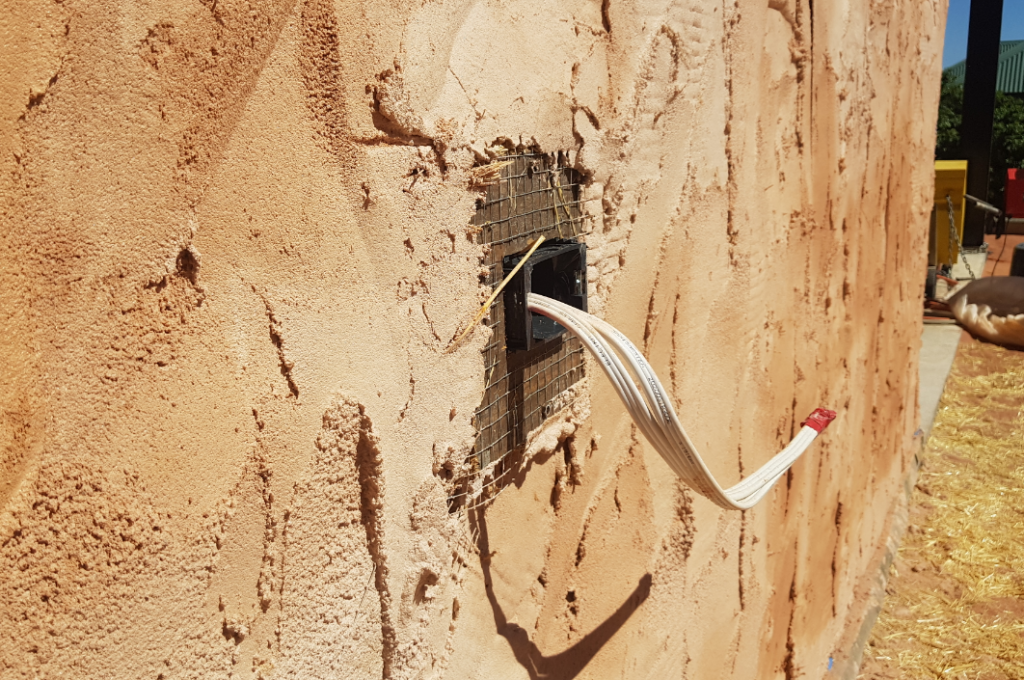
This was when I tapped the wall box into place, and the render was already strong enough to hold it rigid, so I’m calling that a success.
I had some more time after finishing the east wall, and put another couple of loads through the mixer to do the ground-level stuff on the ‘front’ wall of the shed where the main doors will be:
All in all, a productive day with no real dramas.