Some more lessons in “stop expecting timber to carry too much weight you silly bugger” first – the ladder frame over the main doors, which had magically pulled itself into shape when we tightened the straps on it, was leaning outwards again. I could have worked around it, but it seemed like an unstable arrangement that’d only get worse, and it was a lot easier to fix now.
The main issue was that all the attachment of the ladder frame was to the big posts surrounding the doorways – and those posts are all aligned at the back of the wall plane. So the front edge was relatively unsupported and tended to sag over time.
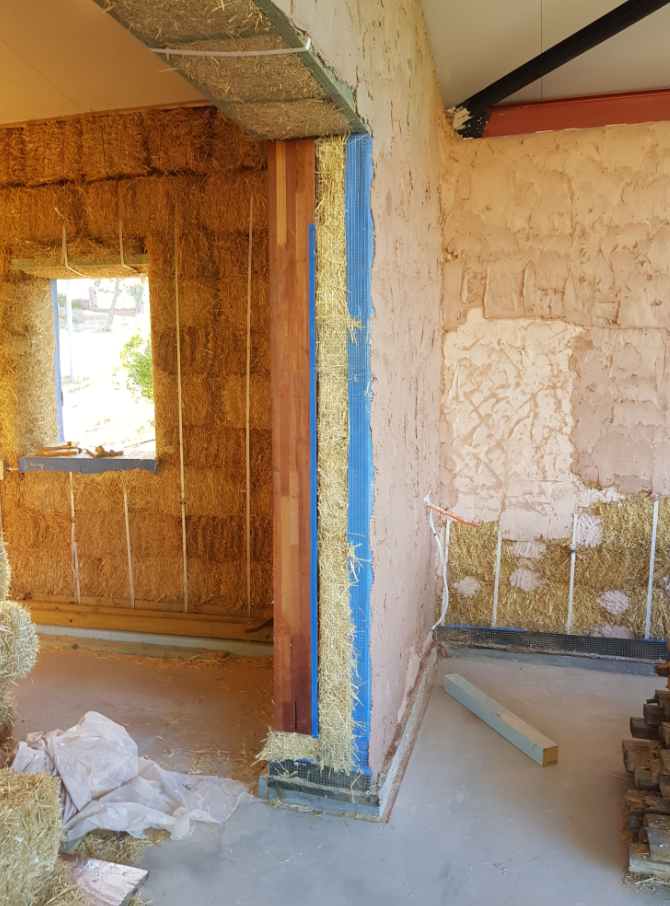
I pulled the meshing away from the front corner of the walls, wedged the ladder frame with a post (the same way I fixed the dusty room doorway) and cut a new post to fit from the bottom ladder in front of the existing post to the front edge of the doorway ladder frame. Knock the wedge out and it dropped nicely into place and locked the new post in place. It means I lose the big sweeping curve on these walls, but the whole thing is a lot more solid. The new post is the blue-wrapped one in the pic on the left.
Onto the rendering for the day, and a section I really wasn’t looking forward to – the section under the gable beam, which goes up to about 4.2m. This was obviously going to be too high for direct hawk relays, and I couldn’t think of a really efficient alternative.
We ended up doing it with me up one ladder with hawk and trowel, while dad relayed a bucket up a second ladder and refilled my hawk. This worked reasonably well, but it was bloody tiring work for both of us with lots of ladder climbing. The result was well worth it though:
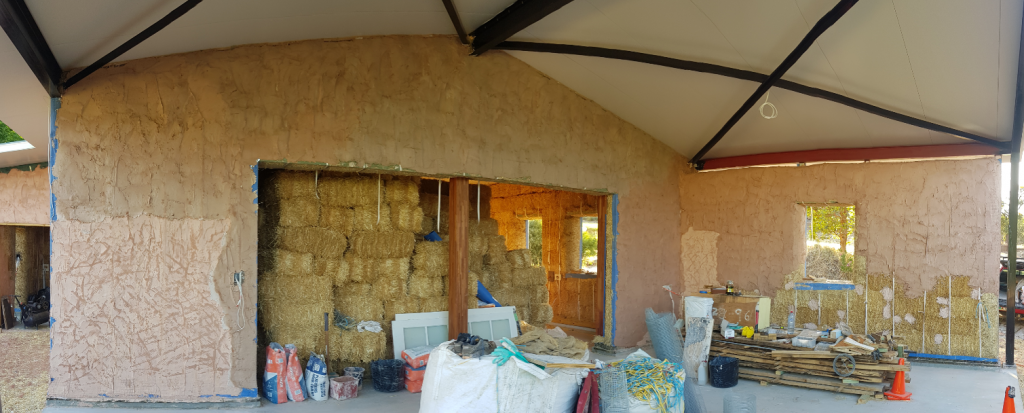
We got the inside face of the false wall mostly done too, before we collapsed in a heap. This was back to hawk-relay height, and went correspondingly faster.
I’ve decided rendering horizontal surfaces (the top of the wall) is my favourite – you can just splat the render down and push it around. So easy! No spills! Rendering curves though…..hoo boy, I need practice at that. I think it’s just a technique thing – when you’re doing flat walls, the trailing edge of the trowel follows the wall and everything makes sense:
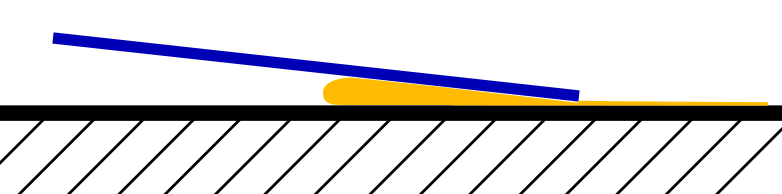
. As soon as you introduce a curve into it, the trailing edge stops automatically contacting the render. If you move the trowel around the curve with the middle of the trowel ‘on’ the surface, the trailing edge is constantly lifting away and either making a crap finish or actively pulling render away with it:
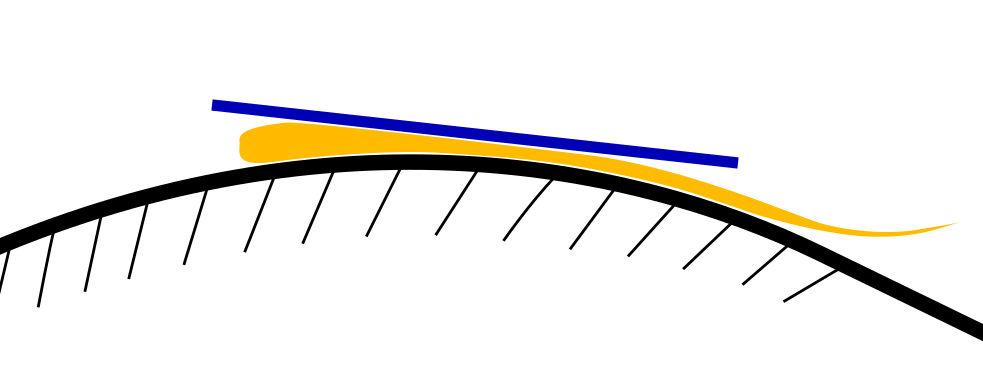
So I’m pretty sure it’s just practicing keeping that trailing edge in contact, which is a slightly counter-intuitive feel.